Getting Started with Integration Guide
Introduction:
In the case of any project development, integration can go a long way to improving project outcomes. Testworthy provided integration with different famous project management tools like Jira, GitHub and Azure.
Integrated applications are project management platform which helps the team in scheduling and tracking the project. Instead of having to open and search through each tool separately to find relevant information, they can find what you need in one tool and instantly see related information that is linked from the other tool.
In Testworthy, you can provide ticket number and read the ticket number, title, description, type, project name, status, assignee, creator, and priority of the tickets directly from Testworthy. Integration with Jira, GitHub and Azure ensures better connectivity and a seamless testing process. This refined process serves to optimize the tracking of test cases by Quality Assurance engineers, thereby augmenting overall project management efficacy within the testing environment.
Jira Integration:
Testworthy implements a bidirectional integration with Jira, facilitating users in establishing links between ticket IDs and corresponding test cases and defects. This integration seamlessly retrieves pertinent data from Jira, presenting comprehensive ticket information within the Testworthy interface.
To successfully execute this integration, adhere to the detailed steps outlined below. The following key values are prerequisites for initiating the process:
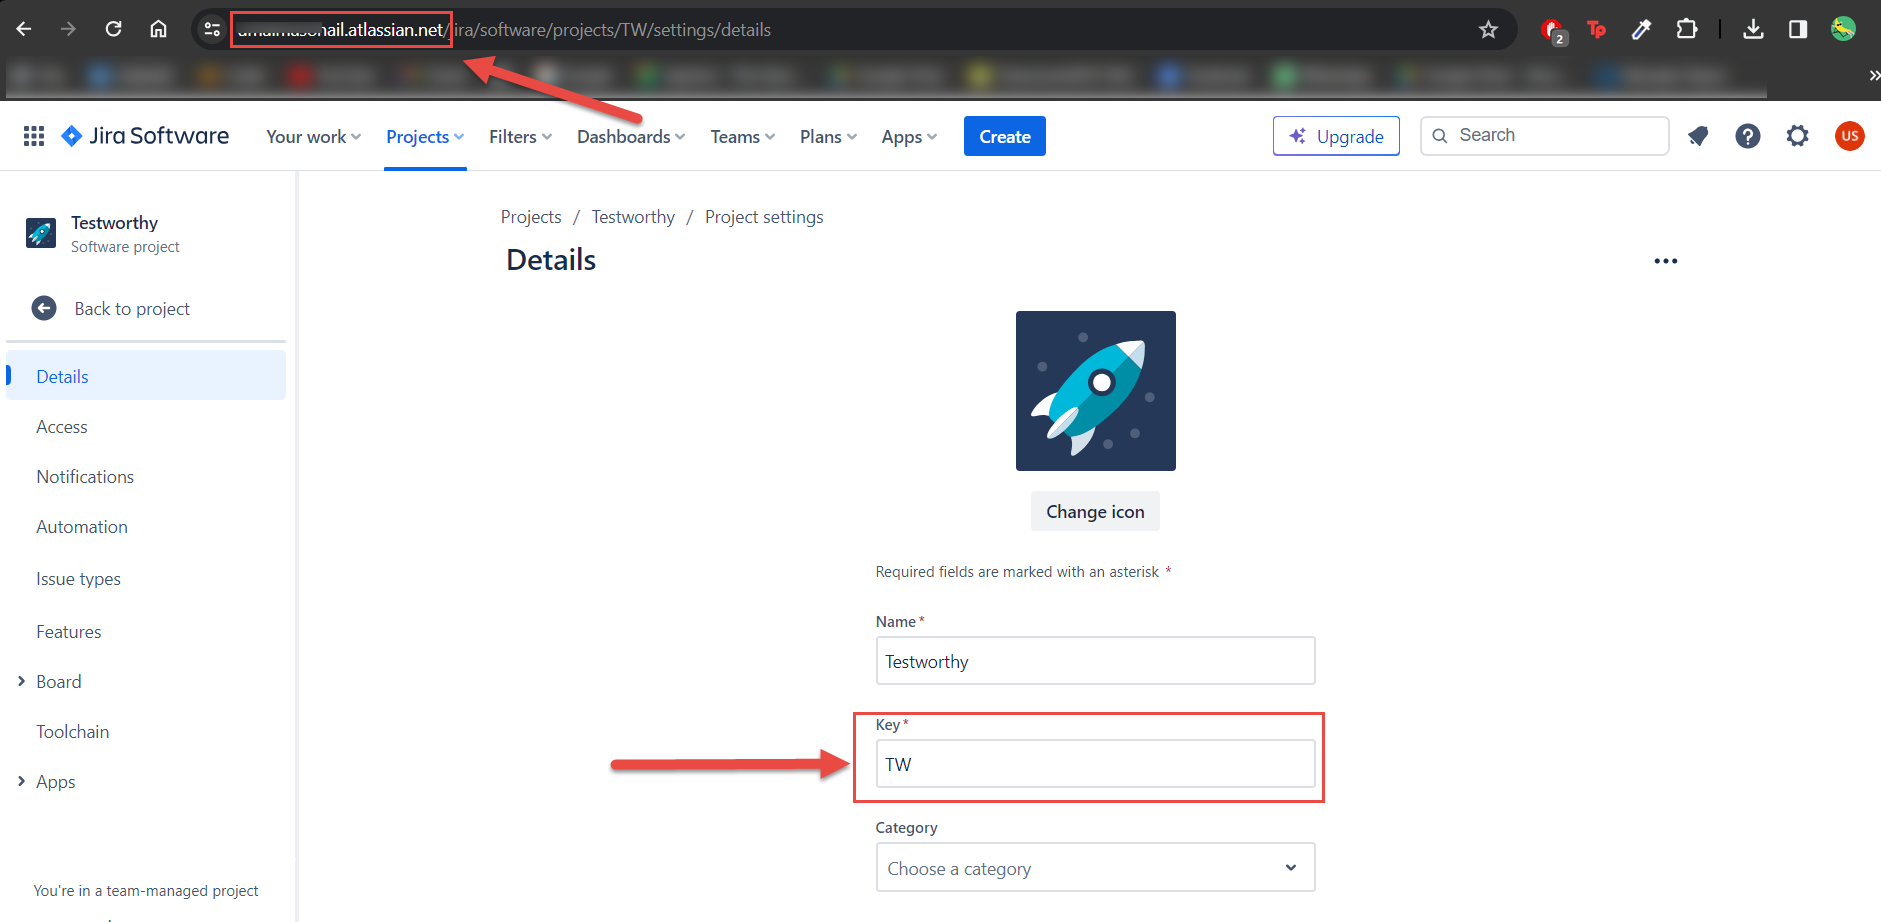
STEP 1: Extract project information from Jira
Click on the right corner avatar icon then click on the 'Project Setting' in your Jira side panel to retrieve the "Key" as exemplified in the provided screenshot.
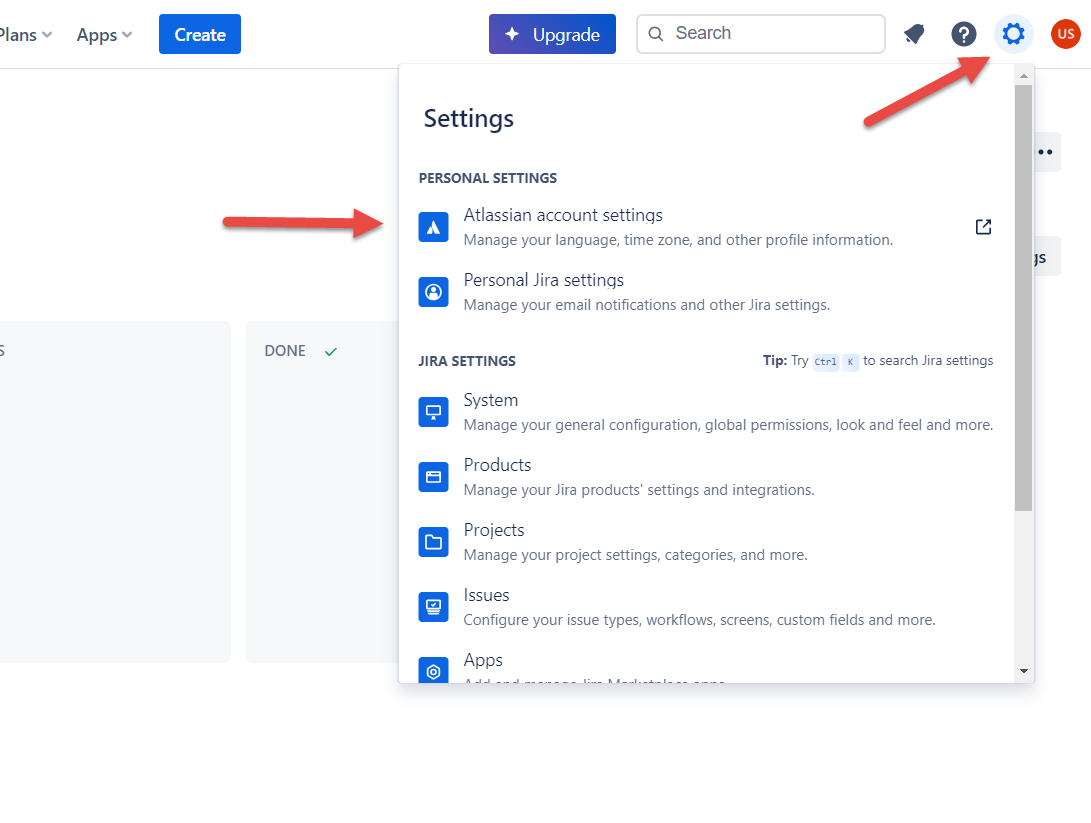
STEP 2: Extract Personal Access Token
Navigate to settings by clicking on the gear icon in the top-left corner of the screen.
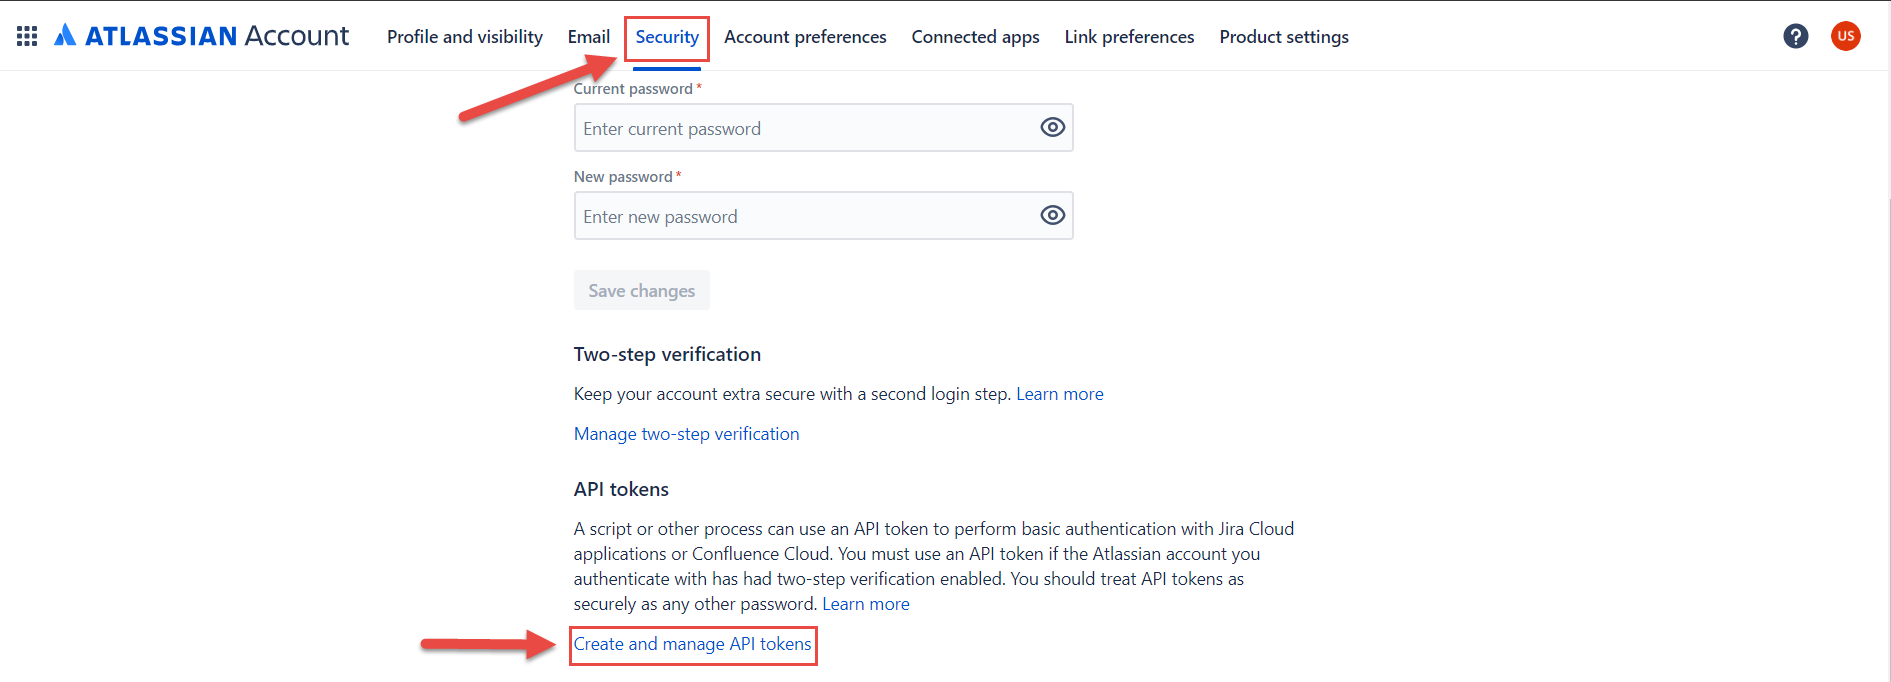
Step 3
In the security settings menu, select "Create and manage API tokens."
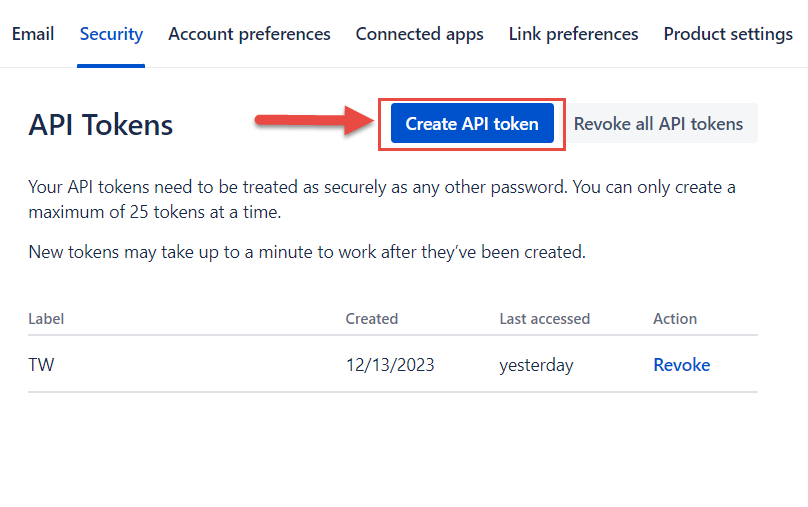
STEP 4: Create a new Token
Click on 'Create API token' in the API tokens section.
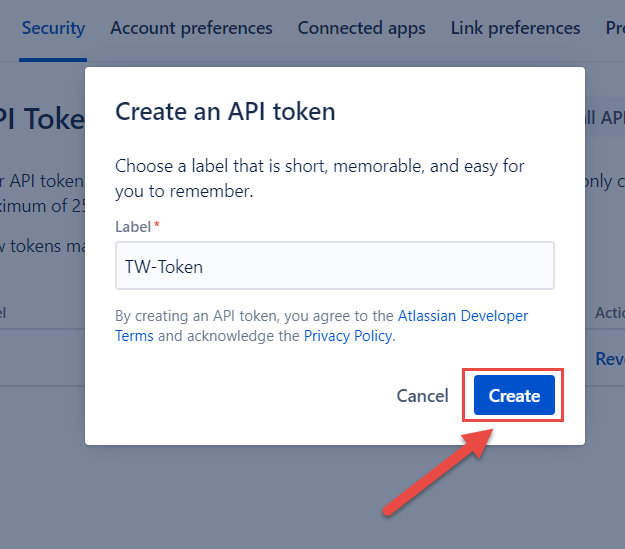
STEP 5: Create an API token
Enter the label then click 'Create' to generate the token.
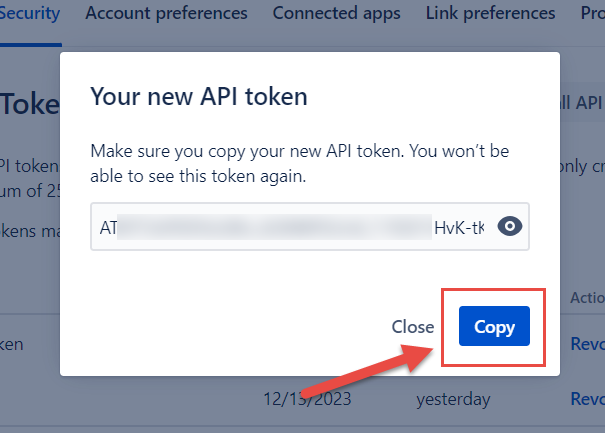
STEP 6: Copy and Save Token
Follow the provided instructions to copy and securely save your API access token.
Azure Integration:
Testworthy implements a unidirectional integration with Azure DevOps, facilitating users in establishing links between work item IDs and corresponding test cases and defects. This integration seamlessly retrieves pertinent data from Azure DevOps, presenting comprehensive work item information within the Testworthy interface. To successfully execute this integration, adhere to the detailed steps outlined below. The following key values are prerequisites for initiating the process:
- Name of your project on Azure DevOps
- URL of your project
- Your project’s access Token
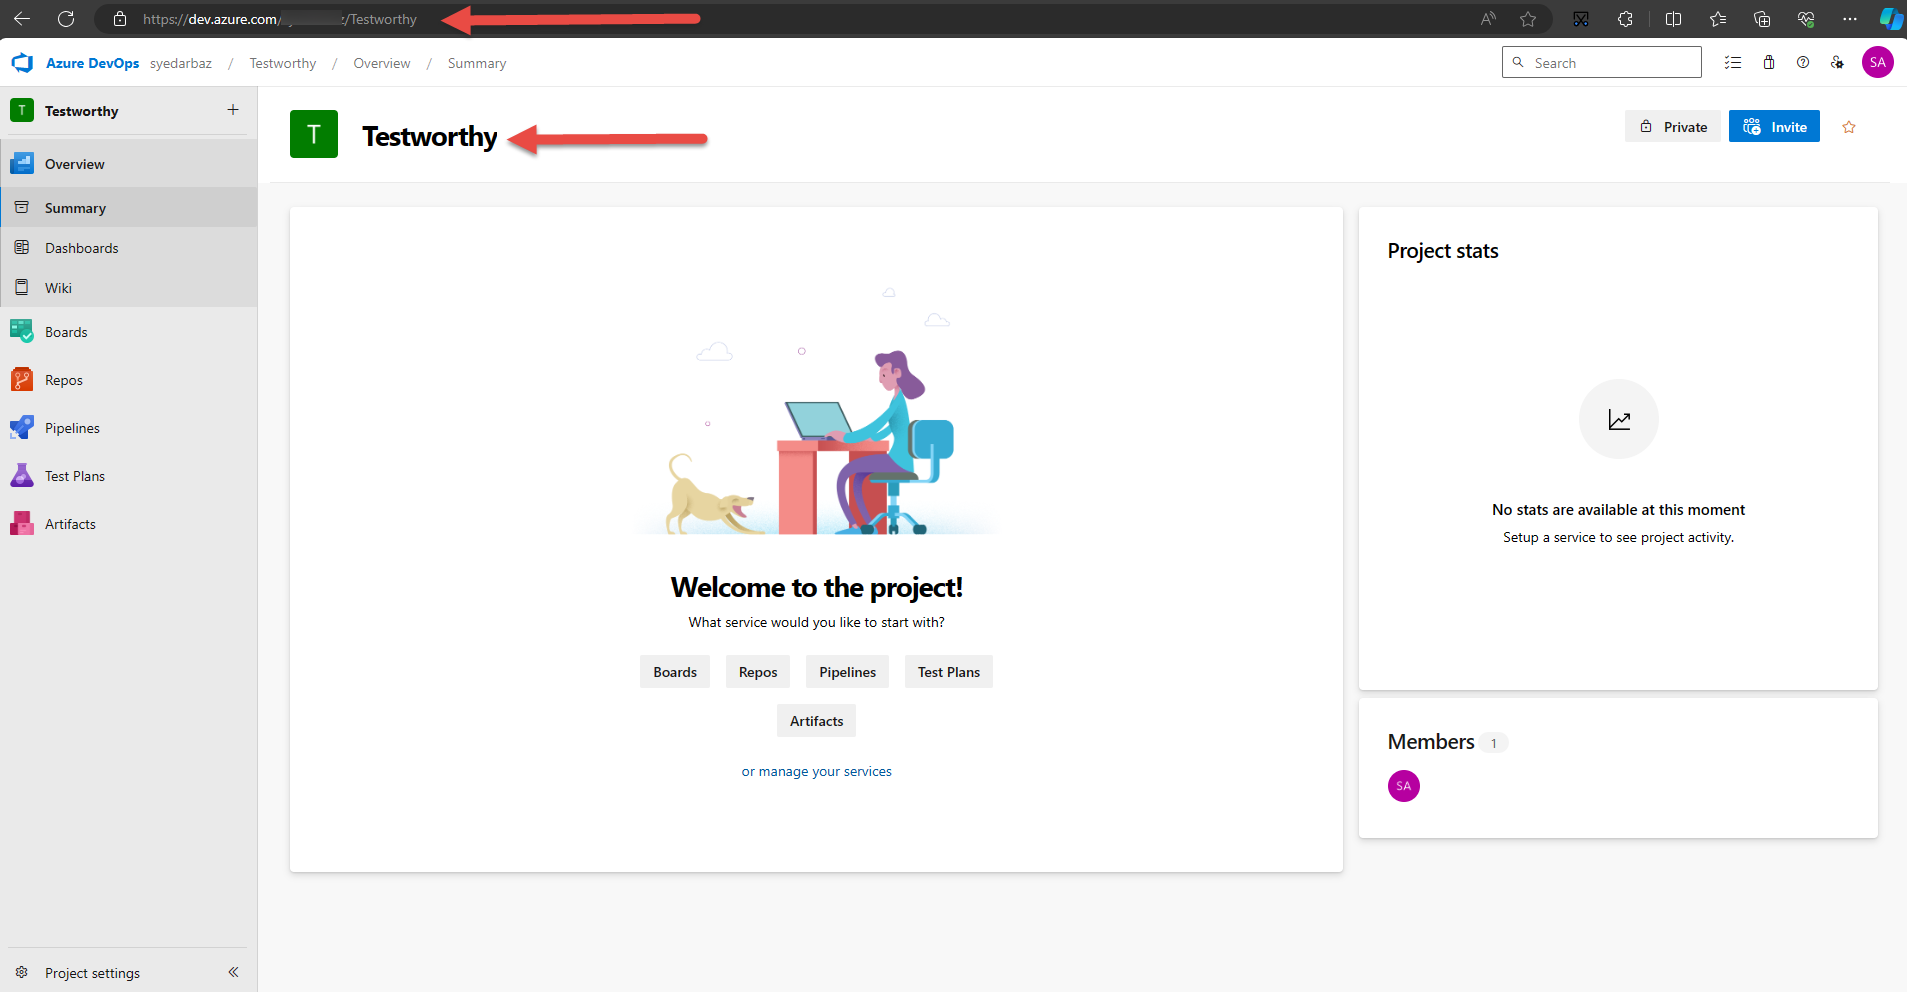
STEP 1: Extract project information from Azure DevOps
Click on the 'Overview' tab in your Azure DevOps side panel to retrieve the "Project Name" and "URL," as exemplified in the provided screenshot.
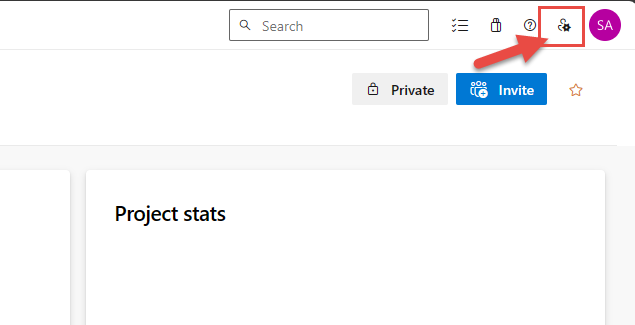
STEP 2: Extract Personal Access Token
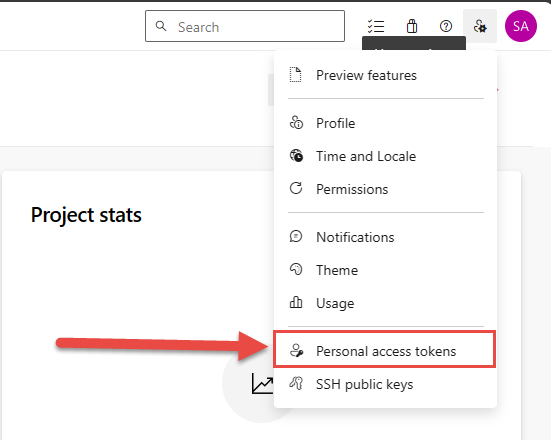
Navigate to user settings by clicking on the user icon in the top-left corner of the screen.
Step 3
In the user settings menu, select "Personal access tokens."
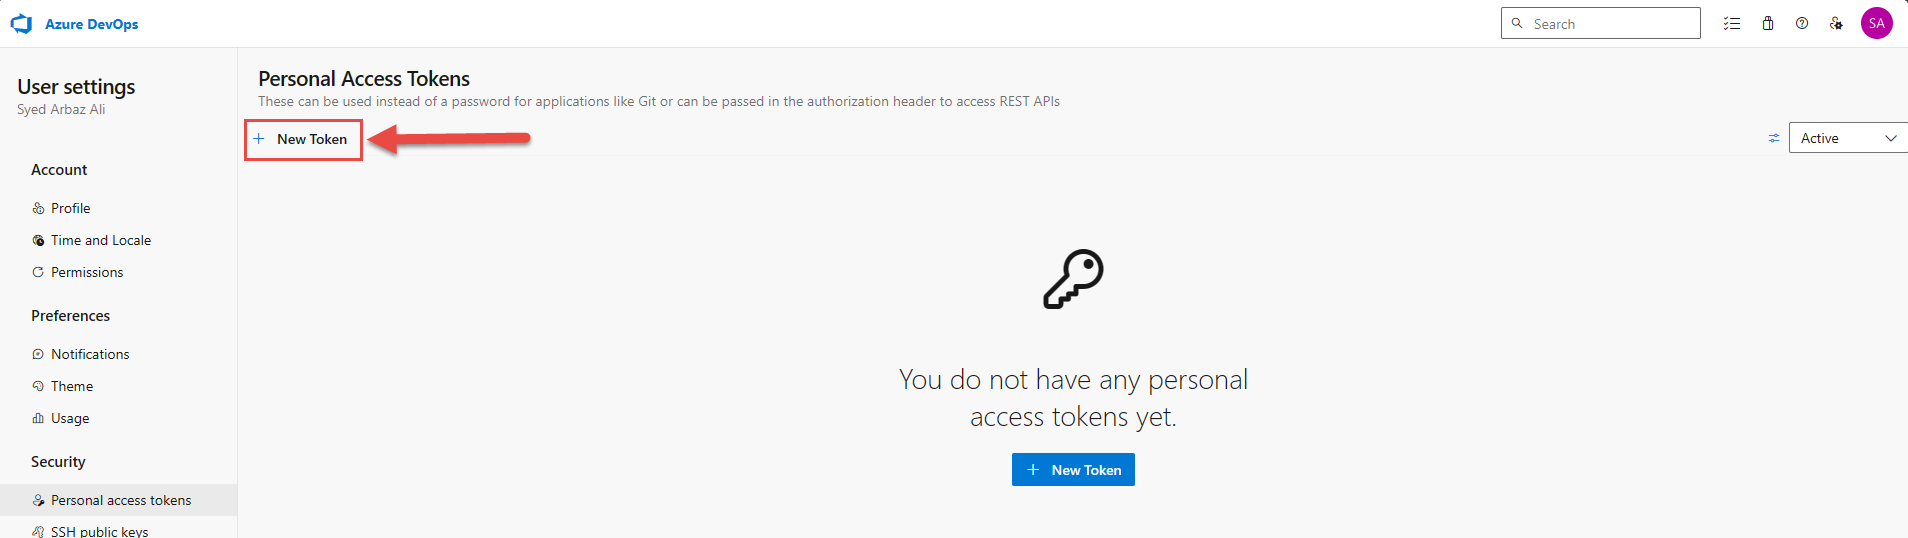
STEP 4: Create a new Token
Click on 'New Token' in the Personal Access Tokens section.
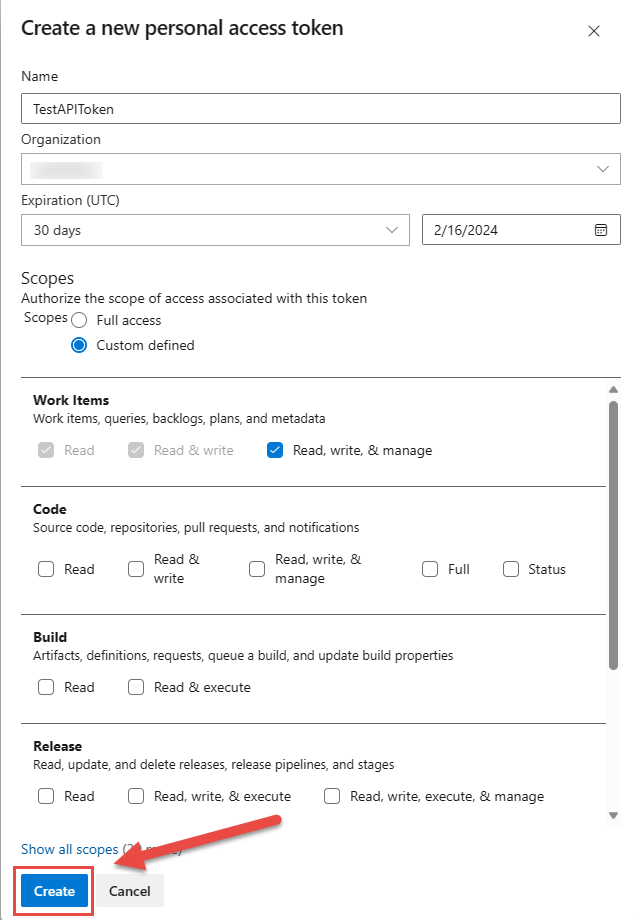
STEP 5: Token Configuration
Complete the form to specify necessary permissions for the token. Click 'Create' to generate the token.
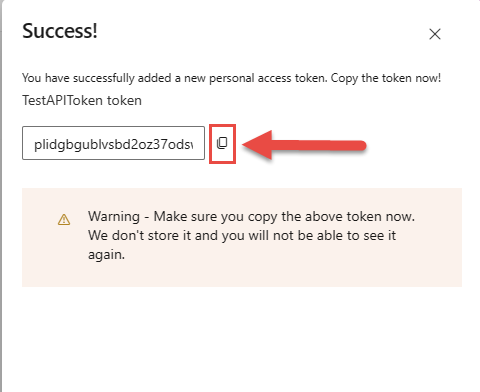
STEP 6: Copy and Save Token
Follow the provided instructions to copy and securely save your personal access token.
By meticulously following these steps, you can seamlessly integrate Azure DevOps with Testworthy, ensuring a cohesive and efficient experience.
GitHub Integration:
Testworthy integrates with GitHub in a unidirectional manner, making it easier for users to create connections between issues on GitHub and related test cases and defects. For initiating the process, please see the steps below:
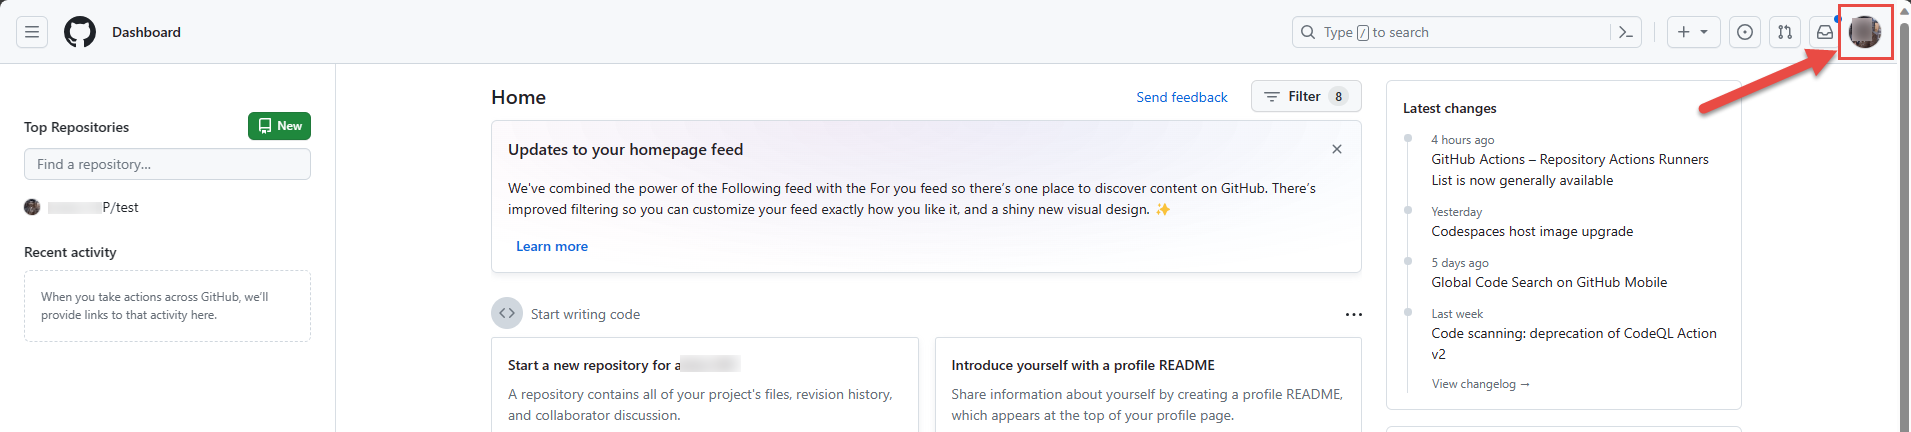
Step 1
Select the particular project from GitHub and tap on the profile image from the rightmost corner.
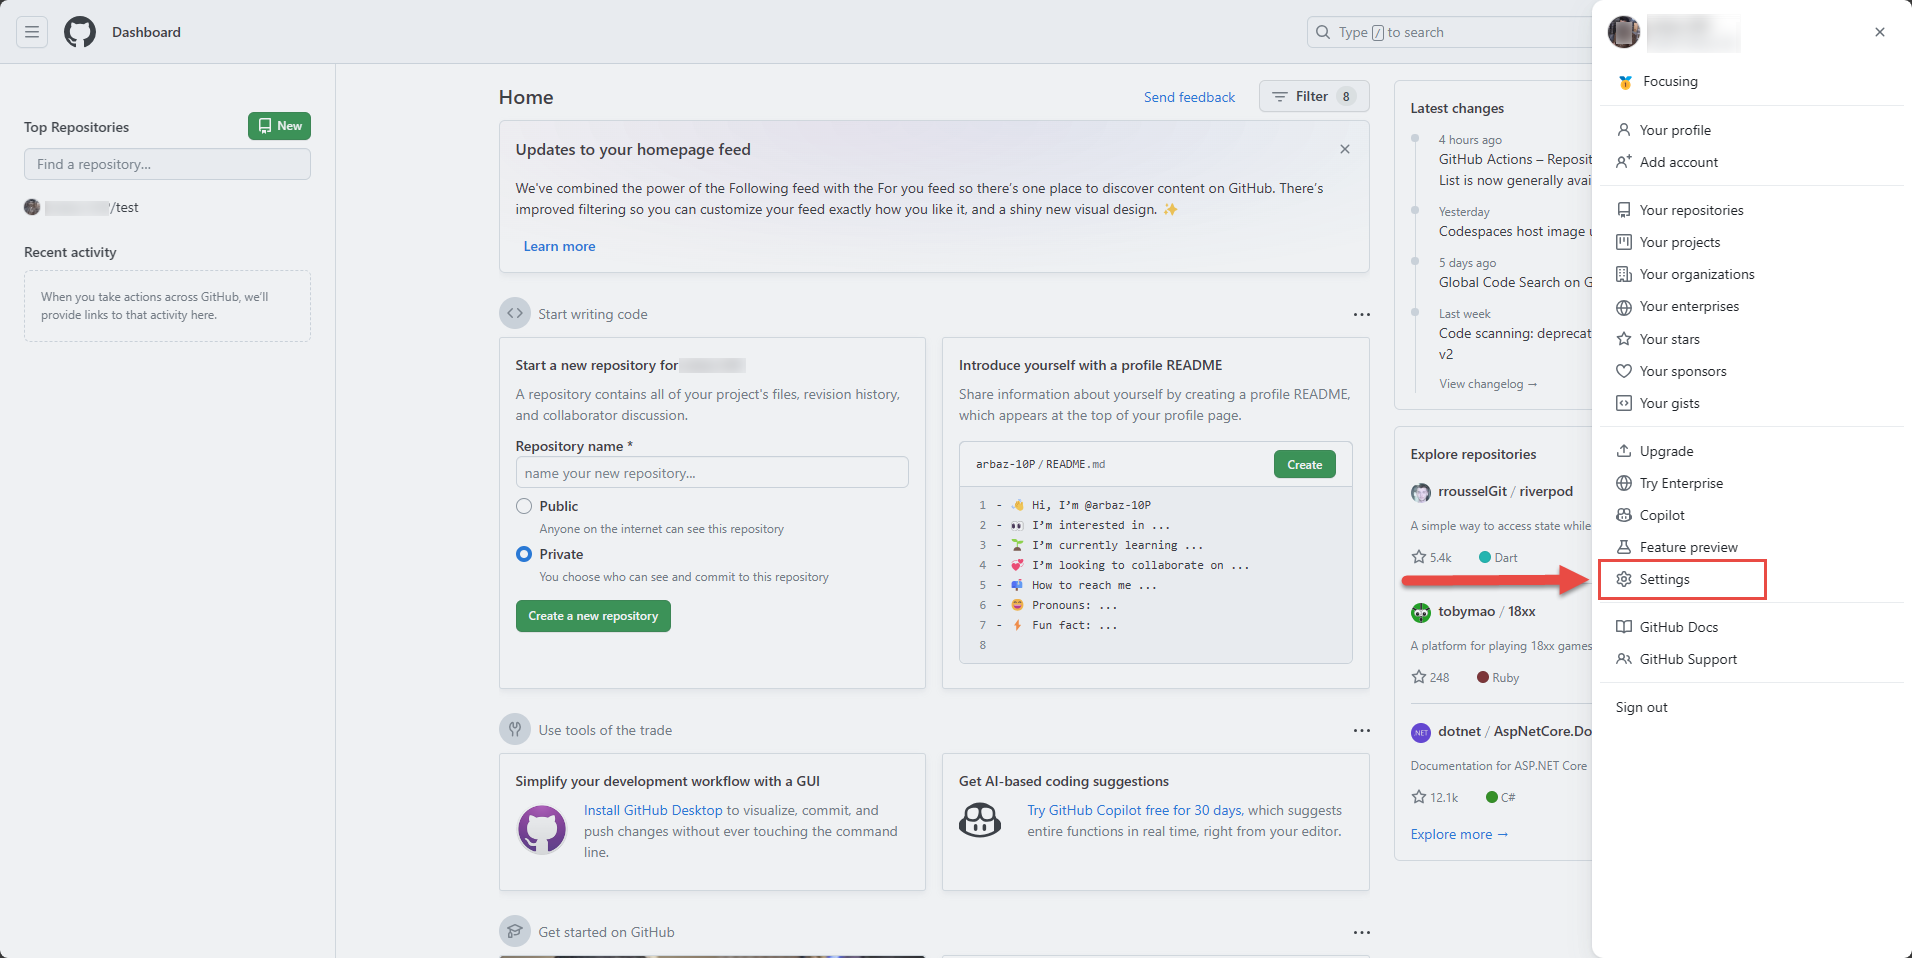
Step 2
Select the settings
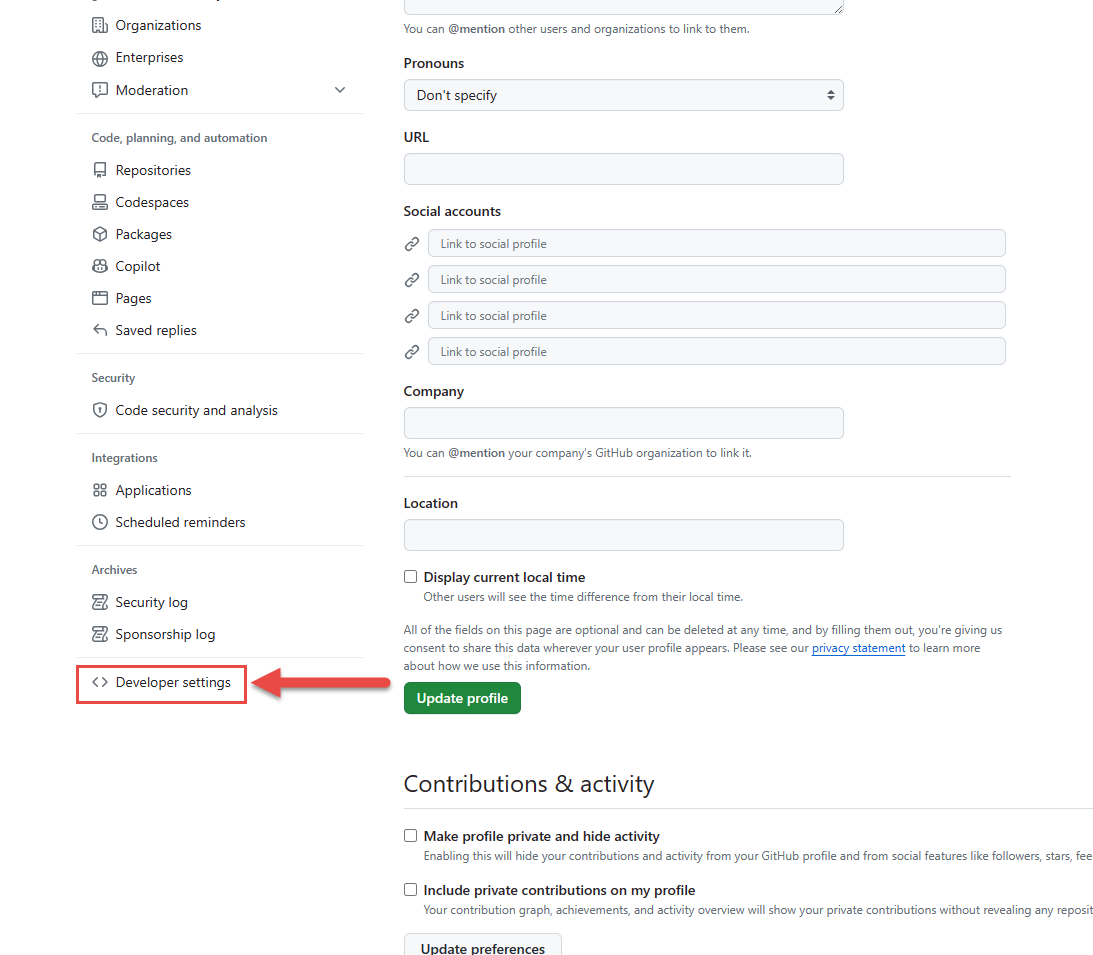
Step 3
From the left sidebar, select Developer settings.
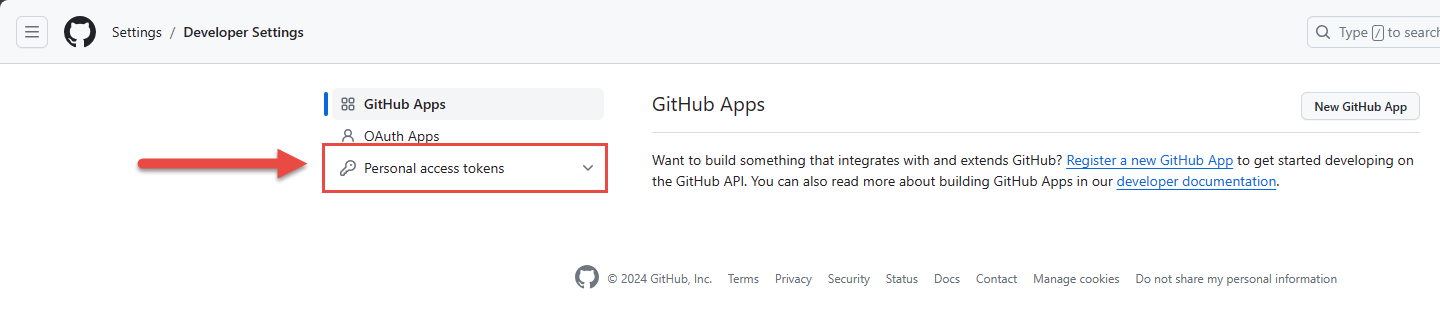
STEP 4
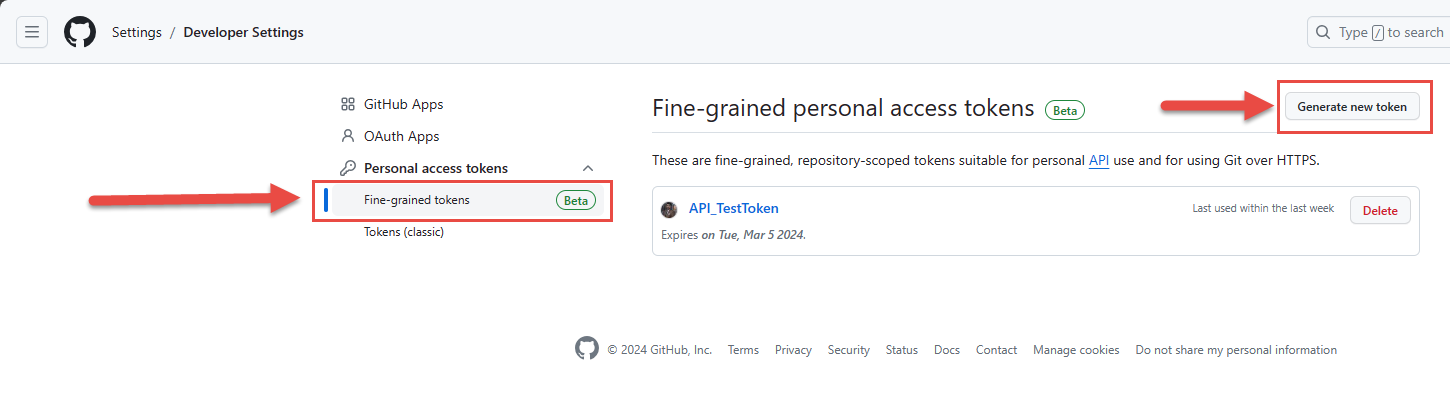
From the left sidebar, select Personal access tokens
STEP 5
Tap on the “Generate new token” button.
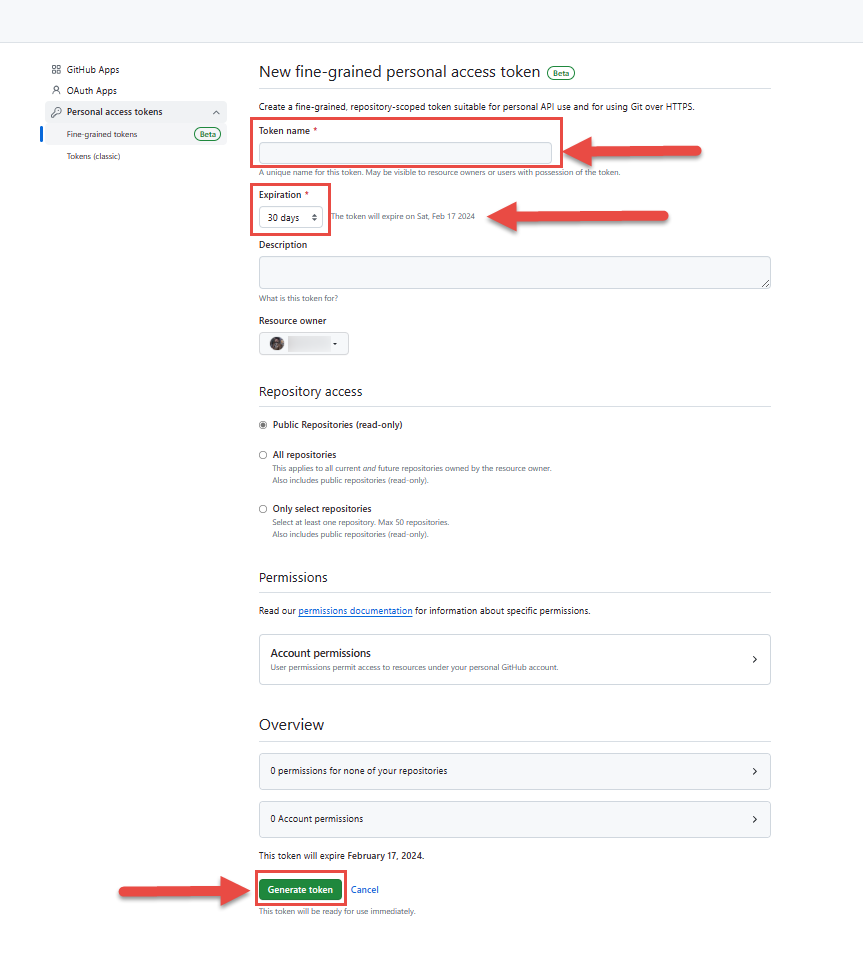
STEP 6
Fill in all the mandatory fields then click “Generate token”.
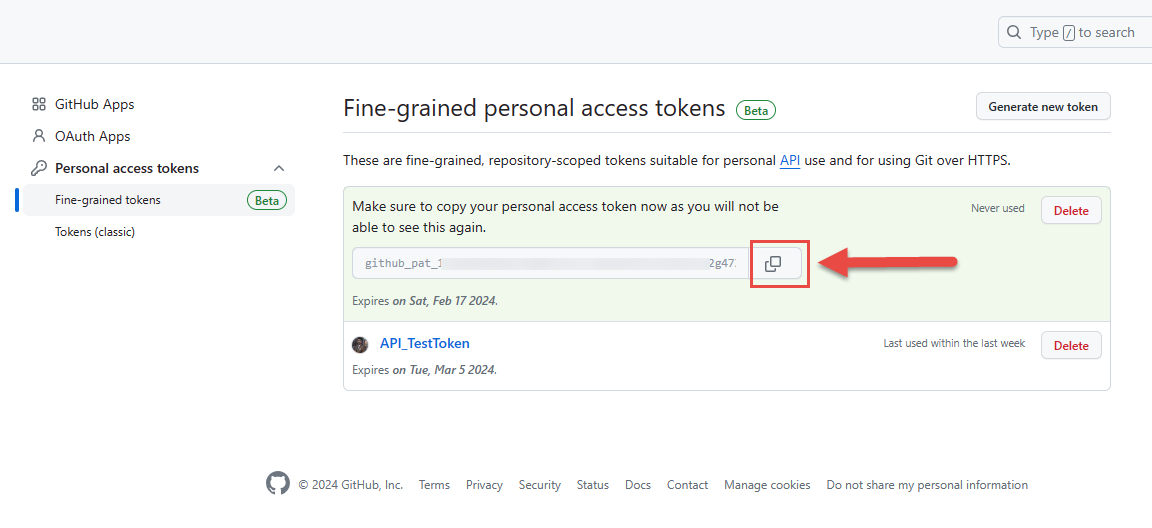
STEP 7
Your new access token has been generated successfully. Copy the token and paste it into the access token field on the Testworthy integration form.